To get us started, I thought I'd break out with a rules demo as a way to walk new players through a single turn of the game and cover many of the basic mechanics of the game as well as cover what makes Disposable Heroes II a unique and tactical system.
This demo game pits a German rifle platoon against a French GRDI motorcycle platoon.
Before we dive into the game, allow me to introduce the core concepts of the game as covered in the main rule book. If you are already familiar with these concepts from the book, feel free to skip ahead to the action. If you are just getting into Disposable Heroes II and would like to get an idea of what the system is all about, check it out!
Essentials:
Scale: Disposable Heroes is designed for 28mm, 20mm, and 15mm miniatures. The ranges and measurements should remain the same regardless of what scale players are using.
Basing: All models
should be individually based where possible. Counters can be used to keep track
of casualties if using bases with more than one miniature.
Ground Scale: Disposable
Heroes II is designed to use a 4'x6' or 6'x8' table representing a platoon
attack front. Typically, in WWII, this was 50 to 100m. The table represents where
a platoon in attack with two squads up front and one in reserve comes into
contact with a platoon in defense of one squad on the line, one in reserve, and
the other off table defending another part of the line. The units on the table
are the rifle squads and some platoon support weapons that might be available.
Most heavier support weapons at the platoon or company level will be used in
the game, but off table, representing these assets being off the main line of
resistance. The scenarios used in this book to play the game are based on these
concepts for simulating that small space where platoons come into contact
during battle.
Core Concepts:
Disposable Heroes II is designed around several core concepts. These include
the idea of modern combat taking place on an "empty battlefield",
about rewarding small unit tactics of fire and maneuver, about the shock of the
first moments of contact in combat, about managing the friction produced by
units in contact with the enemy, and about the difficulty in causing casualties
among troops who have gone to ground by direct fire. Each of these is discussed
below.
The Empty Battlefield:
Modern combat has been described as taking place on an "empty
battlefield". Few soldiers ever see an upright, live enemy. Modern weapons
and dispersed tactical formations means troops will spend much of their time in
combat in cover, using cover to move, and with a limited view of the
battlefield or even the enemy. The scenarios in Disposable Heroes II recreate this
by starting the game with few units on the table and introducing units only as
the action develops and as players react.
Fire and Maneuver: Disposable
Heroes II rewards small unit tactics. Fire and maneuver are necessary to win.
The combat system produces more suppression of the enemy than casualties (and
once an enemy has gone to ground, it can be almost impossible to inflict
casualties with direct fire weapons). Only through suppression of the enemy by
quickly developing fire superiority, and then moving into close contact to use
grenades and assault will you be able to take and hold ground. Indirect fire is
useful for suppression and inflicting casualties on enemies gone to ground, but
in the end, your infantry must go in and take ground.
Contact: Disposable Heroes
is unique in WWII rules sets in that it portrays the initial shock of contact
with the enemy. Scenario design and the First Fire rules create a tense situation
where an attacking player is not aware of the location of the enemy until
revealed and the first contact with the enemy will often be decisive in shaping
the battle for both sides.
Friction: Disposable Heroes
uses an alternating Activation system, and the role that suppression plays in
the game means that players will find it challenging to manage their units in
action once committed to a course of action, the shock of contact with the
enemy, and the limited amount of actions they are able to take once units
become suppressed. It will require tactical skill to prioritize assets to
achieve battlefield goals against an active enemy.
Casualties: Disposable
Heroes II is not a game of destroying the enemy and inflicting casualties. In
some situations during a game, this can be nearly impossible. Casualties are
difficult to inflict, rallying can be unreliable, and you never can know for
sure if an enemy unit has been neutralized or will regroup and come back into
the fight. Casualties aren't always permanent.


This demo game puts a German Rifle platoon up against a French GRDI motorcycle platoon (in this game, dismounted).
The core concept of the attack and defense scenario in Disposable Heroes II is the platoon frontage. This is not only a suggested framework, it is integral to creating a more realistic platoon level simulation. So what does a platoon frontage mean in Disposable Heroes II? Well, in many platoon level games (including the original edition of Disposable Heroes & Coffin for Seven Brothers), most players simply took a platoon each with HQ and support weapons and then blasted away at each other. If it was considered at all, some times one player was given a larger force (or more points) if they were the attacker. Very rarely do rules sets at this level consider actual platoon frontages (which are admittedly, a very broad guideline due to combat zone, armies, or circumstances).
In Disposable Heroes II, the table approximates a platoon frontage. More importantly, the rules focus not only on that distance, but what a platoon is actually doing and what units will be fighting in that space. In most armies, line units often operate on the two up, one back principle. This means for a platoon, two squads will be on the line, with one squad in reserve. The most important element of this is the difference in platoon frontages for attacker and defender, and this is where the platoon level game of Disposable Heroes really shines. If the table space represents a platoon frontage, it is that of the attacker. In most cases, this is anywhere from 25 to 100 yards. In that space, the attacking player will have two of his squads on the line with one in reserve. However, platoons in defense covered a much wider area, often anywhere from 50 to 300 yards! On the table, this means the defending platoon will have one squad on the line on the table, with the second squad off table to either side (and thus not participating in the game-directly), with a squad in reserve.
This means for an attack and defense scenario which represents the majority of WWII combat, the attacker has two squads to fight with against a single squad for the defender. Both players will have reserves, but as you will see, they can only be brought in the game under certain conditions.
Now that we've discussed platoon frontages, let's take a look at the game set up and see how this translates to the table top.
One of the major elements of the game is fog of war. How does Disposable Heroes create the "empty battlefield" and maintain a fog of war? Easy! The rules force the attacker to advance across a table without knowing where the defender is deployed until they reveal themselves by fire or moving.
When setting up a table, or using a scenario either from the book, or from another system or scenario resource, both players will be placing five Deployment Points across their deployment zone. For the attacker, these represent avenues of approach towards enemy positions. Ideally, these are routes that offer cover or areas out of LOS to open ground the enemy might have covered by fire. For the defender, these points represent the positions that offer the best LOS to areas the enemy might approach from and the best field of fire. Ideally they will also be positions in the best cover available.
Once both players select their Deployment Points, those locations chosen by the defender then become the location or locations that must be captured by the attacker. Thus the defender has also created the victory conditions for the attacker. In platoon combat, ground must be taken from the enemy and held against counterattack.
With this in mind, the objectives of the game are now set:
In the first turn of the game, the attacker must capture one of the defender's Deployment Points. If the attacker is unable to do this, his attack dies down and the game is over. However, if the attacker can capture one of the defender's Deployment Points, the game enters into a second turn. On this turn, the attacker must hold his captured Deployment Points, and/or capture a second by the third turn. However, it is not that simple. In the second turn, both players are able to bring in their reserves. The idea being that reserves are to reinforce a breakthrough or plug a gap in the line. The attacker may bring his third squad onto the table from any of the Deployment Points he currently holds while the defender may do the same from any of his remaining Deployment Points (as long as those reserves do not enter the table closer than 12" to an enemy unit). If the attacker can hold his captured enemy Deployment Points by the end of the second turn, he wins. If defender can recapture his Deployment Points from the enemy during the second turn, the game will enter a third turn to decide the final winner of the battle.
With these objectives in mind, how do the units come onto the table and how does this maintain the fog of war?
Before starting the game, each player will choose Deployment Points for each unit in his force. The players may place numbered markers or dice next to their units off table indicating which Deployment Point they will deploy from. Once decided, these Deployment Points will be where the attacker brings his units onto the table while the defender will be keeping his units off the table until they fire or move and reveal themselves. In this way, the attacker does not know where the enemy is deployed, and he must plan his attack accordingly. He might have an idea of where the enemy will place his units based on what terrain seems best for defense, but he cannot be sure. Also, when his units enter the table, the battlefield will be truly empty. Only when the defender opens up with his units will the battle develop as the attacker reacts to the situation and the defender tries to stop the advance.
Since the attacker must capture an enemy Deployment Point within the first turn, he must move quickly, and he must move with purpose. He must also balance this movement with enough firepower to suppress the defender to move into their positions. This may be done by outside support weapons such as mortars or HMGs, or with the squad LMGs, or both. Here is where good tactics will pay off. On the other side of the table, the defender knows he only has a single squad to cover his deployment zone (and defend five Deployment Points with fewer units), so he must place his men carefully. He must be able to cover as much ground as possible against the enemy, and yet prepare for the possibility that the attacker will go after a weak spot in his defense or use an approach that makes it difficult to bring his fire to bear. He must also balance between opening up on the enemy and halting their advance, but revealing his position and allowing the enemy to adapt, or holding his fire until it is most effective but risk allowing the enemy to get too close to overrun his position.
Now that we've got the table ready to go and everyone knows their objectives, how does a turn of Disposable Heroes II play?
Disposable Heroes is played in turns with alternating Activations. Each player has a pool of Activations determined by the Guts score of his platoon HQ (yellow) and the platoon's Training & Experience (green). These are your Activation Pool. Yellow Activations are used to move and shoot with your units and when it is your turn to Activate, you must spend a yellow Activation from your pool (even if you plan to do nothing that Activation, it is still spent and removed from your pool). When a player Activates, he may spend that Activation on any unit in his platoon (or on support weapons or any other unit). He may also Activate the same unit every time he Activates.
This is extremely important. Many players will assume that this is an unfair advantage or makes it too easy to have units do what you want. However, the player that Activates the same unit over and over will find that the rest of his force is doing nothing at all. This forces players to use their Activations between their units to coordinate a tactical plan. You might be able to throw that rifle squad across the table to capture their objective, but you will not have provided them with any fire support! This forces players to use sound tactics and balance fire and maneuver. It also allows for a much smaller force to defend a larger area with dedicated machine gun fire. The game will be won by balancing the actions of your whole force across your Activation Pool, and you will almost never have enough to do everything you want, or need to do!
This creates friction. There are players who feel that randomness can create friction in a game. That random movement distances or random chances of using a unit somehow creates friction (when all it does it create randomness). There is nothing wrong with this approach. But it is rather limited. Disposable Heroes II is a system that creates friction through the actions of the players. Real battlefield friction comes through what you order your men to do and what the enemy does in response, not just random chance. Not that random chance doesn't play a role. You will find those moments in Disposable Heroes II where your squad that is pinned down will fail their morale rolls and stay put when you desperately need them to move.
Back to the action.
So what are the green Activations for? These can be spent as a normal Activation, or they can be used as a "Push" Activation. This gives a player the ability to spend a normal Activation (yellow), and then immediately follow with a Push Activation (green) as a bonus Activation. This allows a player to give his platoon an extra burst of action to pull off his tactical plans or to respond to an emergency as it develops. However, only higher quality troops with higher levels of training and experience may do this. As you will see, it can really swing a battle in moments of crisis.
Now that we have our mission, and the basics of Activations down, let's dive into the game and see how it works in action.
Here is the German rifle platoon: A platoon HQ with a 5cm mortar led by a lieutenant, two rifle squads, and a rifle squad in reserve. The rifle platoon is supported by an off board HMG (more on that later).
Here is the French GRDI motorcycle platoon. A platoon HQ, and a GRDI motorcycle squad with two LMGs. Since they are defending, the squad will be dismounted.
Let's get into the action! Both players roll for Initiative, and the winner decides whether he will go first or allow the opponent to go first. The German player wins initiative.

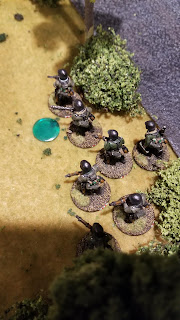
The German player deploys his first rifle squad from Deployment Point 2, and moves them a full 9" down a line of trees and brush, hoping to get into the enemy deployment zone as fast as possible.

So how does movement work anyway? Well, when a player spends an Activation, he gets three Tactical Points to spend on a unit (or units). These Tactical Points can be any combination of Movement or Shooting. Tactical Points can be shared with another unit as well, which allows for squad movement. Movement Tactical Points each give a unit 3" or movement. So, if a unit spends all three Tactical Points on movement, they may move 9". Movement Tactical Points shared with another unit allow both units to love that same distance (as long as both units are within their Guts score in inches of each other). So, for this Activation, the German player Activated his rifle team of the rifle squad, spent all three Tactical Points on movement (9") and shared that with the LMG team of the rifle squad. The whole squad then moves forward 9".

The French player demonstrates a cool calm as the Germans advance down the road along the tree line. He waits for two Activations before opening up with his LMG team in the second floor of the barn. One of the unique rules in Disposable Heroes II will be used to good effect here. The French player declares First Fire, and opens up with his FM M1924/29 LMG. The first burst of fire shatters the quiet of the countryside. The Germans, who had been advancing into the unknown, are suddenly hit by fire and sent scrambling to Hit the Dirt. So what is "First Fire" and "Hit the Dirt!"
First fire is a way to recreate those first, violent moments of contact between enemy forces in WWII. The first player to fire during the game gains the First Fire bonus. This bonus removes the cover modifier to hit the target (so the Germans went from having light cover of -2, to no cover). Also, this bonus changes the effect of the fire from an I/S of 1/8 to an I/S of 8/10. What is I/S? This is Incapacitation and Suppression. In short, it is what a weapon needs to wound on a D10 and what a weapon needs to Suppress. As you can see, the wounding characteristic is much lower (almost always a 1) and the suppression characteristic is much higher.
Hit the Dirt is another special rule used to recreate the effect of fire on troops. While First Fire is very deadly for that first burst of fire, Hit the Dirt goes the opposite direction. Once infantry have been targeted, it is a natural reaction to hit the ground and hug cover. Troops that have become suppressed become almost impossible to hit with direct fire. Only mortars or grenades will dig these troops out of their positions. They might not be going anywhere any time soon, but they will not be able to be hit either. To represent this, a unit that is Suppressed (has failed a Guts check and has a red Suppression Marker), cannot be wounded by direct fire (only blast weapons and indirect fire, and grenades). The I/S of direct fire weapons becomes 0/X. The unit can become Suppressed further by failing more Guts checks from fire, and if they acquire more than five Suppressions, they will be removed from the game.

Here we see the French LMG team open up on the German rifle squad using First Fire. They inflict three wounds and six Suppressing Hits on the German rifle squad.
Not content to just take fire without responding, the German player Activates and unloads with his squad MG-34 LMG. The fire is surprisingly effective, and inflicts three Suppressing Hits. The French player fails all three!


So how does firing work? When a player Activates a unit, he may spend his Tactical Points on shooting. Shooting Tactical Points can be shared with nearby units (within LOS and their Guts score in inches). Unlike movement Tactical Points, however, shooting Tactical Points must be spent on each unit for both of them to fire (they do not share their shooting like they do inches of movement).
For each shooting Tactical Point spent, a unit may roll 1D10 for each Fire Point (FP) of the weapons in their unit. These Fire Points are per type of weapon firing, not per the number of weapons firing. For example, a rifle has a FP of 1 while an MG-34 has an FP of 4. This gives 1D10 per shooting Tactical Point with the rifle and 4D10 with the MG-34. Fire Points are based on the weapon type, not the number of those weapons in the unit. This is extremely important. So a unit armed with only rifles that spends all three shooting Tactical Points on shooting will roll 3D10 (1D10 per shooting Tactical Point for rifles of 1 FP). Unlike rifles, which have a low FP, machine guns have a much higher FP. For example, the belt fed MG-34 has 4 FP, and will crank out an impressive 12D10 across three shooting Tactical Points (4D10 per shooting Tactical Point). This may seem to give rifles an unfair disadvantage in firing. And you would be right! This is on purpose and it brings each of the various weapon types in line with a balanced system of firepower.
For example, in an Activation where all three Tactical Points are spent shooting:
Rifles will fire 3D10 (1 FP per).
Box Fed LMG 9D10 (3 FP per).
Belt Fed LMG 12D10 (4 FP per).
SMG 9D10 (3 FP per).
Belt Fed HMG 15D10 (5 FP per).
These are example Fire Points (each weapon will have its own FP stat, and not all are the same), but they illustrate the concept that automatic weapons are the prime determinant of fire power. This places rifles in the proper tactical context: riflemen are meant to maneuver in close and use grenades and the threat of their bayonet to root out and remove the enemy from their positions. The machine guns are to provide the suppressing power of their high rates of fire to pin the enemy in place to allow rifles to do their job.
It is the German Activation. The player decides he must move to capture a French Deployment Point if he is going to win, and here is where he decides to use his first Push Activation. He Activates as normal with a yellow Activation counter and decides to rally off the suppression from his rifle squad and lay down some fire from the LMG team. This is largely ineffective, as the French shrug it off by passing their Guts checks. Then the German player uses his Push Activation to move his rifle squad into position to assault.
But... The French player has a surprise for the Germans. He decides to Activate his other LMG team from his squad and open up on the German rifle squad. This LMG team was hidden in the outbuilding of the stables on the other side of the road. Here is where another important rule comes into play. The French player has perfectly sited his LMGs to be able to overlap their field of fire and use the Crossfire rule. This allows machine guns (LMG and HMGs) to share shooting Tactical Points as long as both weapons are in range and have LOS to the target. This doesn't give the player more shots, as he can still only use three shooting Tactical Points, but it stacks the Morale Modifier effect on the target unit. What is a Morale Modifier, and how do Guts checks work?

When a unit takes fire, after all shooting Tactical Points have been resolved (wounded models have been removed, and Suppressing Hits added up), the target unit must make a Guts check for each wound and Suppressing Hit inflicted. A Guts check is where a player rolls 1D10 for each check they must make and must roll below their modified Guts score on each. The Guts score is modified by the Morale Modifier (MM) of the weapon, and any wounds inflicted. Machine guns have a MM of -2. In the case of Crossfire, this doubles to -4 MM (-2 MM for each LMG). Since many NCOs in the game have a Guts of 8, this drops their chances of passing Guts checks dramatically. This makes setting up Crossfires with machine guns very useful. With their higher Fire Points inflicting more Suppressing Hits and wounds, and their higher Morale Modifier, LMGs can really stack Suppressions on a target unit. With each Suppressing Hit and wound causing a Gut check, a unit can fail multiple Guts checks and become pinned down. Each of these will need to be rallied spending a Tactical Point doing so before the unit can spend their Tactical Points on doing anything else. This is how suppression builds to fire superiority.
Now the German player is really in a tight spot. His leading squad is pinned down and has taken casualties. He decides to send in his second rifle squad, and they jump off in support of the first in hopes that they will draw fire away or be able to get into a better position to assault.
This is extremely important. Many players will assume that this is an unfair advantage or makes it too easy to have units do what you want. However, the player that Activates the same unit over and over will find that the rest of his force is doing nothing at all. This forces players to use their Activations between their units to coordinate a tactical plan. You might be able to throw that rifle squad across the table to capture their objective, but you will not have provided them with any fire support! This forces players to use sound tactics and balance fire and maneuver. It also allows for a much smaller force to defend a larger area with dedicated machine gun fire. The game will be won by balancing the actions of your whole force across your Activation Pool, and you will almost never have enough to do everything you want, or need to do!
This creates friction. There are players who feel that randomness can create friction in a game. That random movement distances or random chances of using a unit somehow creates friction (when all it does it create randomness). There is nothing wrong with this approach. But it is rather limited. Disposable Heroes II is a system that creates friction through the actions of the players. Real battlefield friction comes through what you order your men to do and what the enemy does in response, not just random chance. Not that random chance doesn't play a role. You will find those moments in Disposable Heroes II where your squad that is pinned down will fail their morale rolls and stay put when you desperately need them to move.
Back to the action.
So what are the green Activations for? These can be spent as a normal Activation, or they can be used as a "Push" Activation. This gives a player the ability to spend a normal Activation (yellow), and then immediately follow with a Push Activation (green) as a bonus Activation. This allows a player to give his platoon an extra burst of action to pull off his tactical plans or to respond to an emergency as it develops. However, only higher quality troops with higher levels of training and experience may do this. As you will see, it can really swing a battle in moments of crisis.
Now that we have our mission, and the basics of Activations down, let's dive into the game and see how it works in action.
Here is the German rifle platoon: A platoon HQ with a 5cm mortar led by a lieutenant, two rifle squads, and a rifle squad in reserve. The rifle platoon is supported by an off board HMG (more on that later).
 |
| Platoon HQ with 5cm mortar, led by a Lt. (Guts 10) |
 |
| 1st rifle squad |
 |
| 2nd rifle squad |
Here is the French GRDI motorcycle platoon. A platoon HQ, and a GRDI motorcycle squad with two LMGs. Since they are defending, the squad will be dismounted.
 |
| GRDI platoon HQ |
 |
| GRDI motorcycle squad |

The German player deploys his first rifle squad from Deployment Point 2, and moves them a full 9" down a line of trees and brush, hoping to get into the enemy deployment zone as fast as possible.

So how does movement work anyway? Well, when a player spends an Activation, he gets three Tactical Points to spend on a unit (or units). These Tactical Points can be any combination of Movement or Shooting. Tactical Points can be shared with another unit as well, which allows for squad movement. Movement Tactical Points each give a unit 3" or movement. So, if a unit spends all three Tactical Points on movement, they may move 9". Movement Tactical Points shared with another unit allow both units to love that same distance (as long as both units are within their Guts score in inches of each other). So, for this Activation, the German player Activated his rifle team of the rifle squad, spent all three Tactical Points on movement (9") and shared that with the LMG team of the rifle squad. The whole squad then moves forward 9".

The French player demonstrates a cool calm as the Germans advance down the road along the tree line. He waits for two Activations before opening up with his LMG team in the second floor of the barn. One of the unique rules in Disposable Heroes II will be used to good effect here. The French player declares First Fire, and opens up with his FM M1924/29 LMG. The first burst of fire shatters the quiet of the countryside. The Germans, who had been advancing into the unknown, are suddenly hit by fire and sent scrambling to Hit the Dirt. So what is "First Fire" and "Hit the Dirt!"
First fire is a way to recreate those first, violent moments of contact between enemy forces in WWII. The first player to fire during the game gains the First Fire bonus. This bonus removes the cover modifier to hit the target (so the Germans went from having light cover of -2, to no cover). Also, this bonus changes the effect of the fire from an I/S of 1/8 to an I/S of 8/10. What is I/S? This is Incapacitation and Suppression. In short, it is what a weapon needs to wound on a D10 and what a weapon needs to Suppress. As you can see, the wounding characteristic is much lower (almost always a 1) and the suppression characteristic is much higher.
Hit the Dirt is another special rule used to recreate the effect of fire on troops. While First Fire is very deadly for that first burst of fire, Hit the Dirt goes the opposite direction. Once infantry have been targeted, it is a natural reaction to hit the ground and hug cover. Troops that have become suppressed become almost impossible to hit with direct fire. Only mortars or grenades will dig these troops out of their positions. They might not be going anywhere any time soon, but they will not be able to be hit either. To represent this, a unit that is Suppressed (has failed a Guts check and has a red Suppression Marker), cannot be wounded by direct fire (only blast weapons and indirect fire, and grenades). The I/S of direct fire weapons becomes 0/X. The unit can become Suppressed further by failing more Guts checks from fire, and if they acquire more than five Suppressions, they will be removed from the game.

Here we see the French LMG team open up on the German rifle squad using First Fire. They inflict three wounds and six Suppressing Hits on the German rifle squad.
 |
| The French LMG shatters the quiet with a long burst from their Fusil-mitrailleur Modèle 1924 M29. |
 |
| Shockingly, the German rifle squad passes all of their Guts checks except one! |
Not content to just take fire without responding, the German player Activates and unloads with his squad MG-34 LMG. The fire is surprisingly effective, and inflicts three Suppressing Hits. The French player fails all three!


So how does firing work? When a player Activates a unit, he may spend his Tactical Points on shooting. Shooting Tactical Points can be shared with nearby units (within LOS and their Guts score in inches). Unlike movement Tactical Points, however, shooting Tactical Points must be spent on each unit for both of them to fire (they do not share their shooting like they do inches of movement).
For each shooting Tactical Point spent, a unit may roll 1D10 for each Fire Point (FP) of the weapons in their unit. These Fire Points are per type of weapon firing, not per the number of weapons firing. For example, a rifle has a FP of 1 while an MG-34 has an FP of 4. This gives 1D10 per shooting Tactical Point with the rifle and 4D10 with the MG-34. Fire Points are based on the weapon type, not the number of those weapons in the unit. This is extremely important. So a unit armed with only rifles that spends all three shooting Tactical Points on shooting will roll 3D10 (1D10 per shooting Tactical Point for rifles of 1 FP). Unlike rifles, which have a low FP, machine guns have a much higher FP. For example, the belt fed MG-34 has 4 FP, and will crank out an impressive 12D10 across three shooting Tactical Points (4D10 per shooting Tactical Point). This may seem to give rifles an unfair disadvantage in firing. And you would be right! This is on purpose and it brings each of the various weapon types in line with a balanced system of firepower.
For example, in an Activation where all three Tactical Points are spent shooting:
Rifles will fire 3D10 (1 FP per).
Box Fed LMG 9D10 (3 FP per).
Belt Fed LMG 12D10 (4 FP per).
SMG 9D10 (3 FP per).
Belt Fed HMG 15D10 (5 FP per).
These are example Fire Points (each weapon will have its own FP stat, and not all are the same), but they illustrate the concept that automatic weapons are the prime determinant of fire power. This places rifles in the proper tactical context: riflemen are meant to maneuver in close and use grenades and the threat of their bayonet to root out and remove the enemy from their positions. The machine guns are to provide the suppressing power of their high rates of fire to pin the enemy in place to allow rifles to do their job.

It is the German Activation. The player decides he must move to capture a French Deployment Point if he is going to win, and here is where he decides to use his first Push Activation. He Activates as normal with a yellow Activation counter and decides to rally off the suppression from his rifle squad and lay down some fire from the LMG team. This is largely ineffective, as the French shrug it off by passing their Guts checks. Then the German player uses his Push Activation to move his rifle squad into position to assault.
But... The French player has a surprise for the Germans. He decides to Activate his other LMG team from his squad and open up on the German rifle squad. This LMG team was hidden in the outbuilding of the stables on the other side of the road. Here is where another important rule comes into play. The French player has perfectly sited his LMGs to be able to overlap their field of fire and use the Crossfire rule. This allows machine guns (LMG and HMGs) to share shooting Tactical Points as long as both weapons are in range and have LOS to the target. This doesn't give the player more shots, as he can still only use three shooting Tactical Points, but it stacks the Morale Modifier effect on the target unit. What is a Morale Modifier, and how do Guts checks work?

When a unit takes fire, after all shooting Tactical Points have been resolved (wounded models have been removed, and Suppressing Hits added up), the target unit must make a Guts check for each wound and Suppressing Hit inflicted. A Guts check is where a player rolls 1D10 for each check they must make and must roll below their modified Guts score on each. The Guts score is modified by the Morale Modifier (MM) of the weapon, and any wounds inflicted. Machine guns have a MM of -2. In the case of Crossfire, this doubles to -4 MM (-2 MM for each LMG). Since many NCOs in the game have a Guts of 8, this drops their chances of passing Guts checks dramatically. This makes setting up Crossfires with machine guns very useful. With their higher Fire Points inflicting more Suppressing Hits and wounds, and their higher Morale Modifier, LMGs can really stack Suppressions on a target unit. With each Suppressing Hit and wound causing a Gut check, a unit can fail multiple Guts checks and become pinned down. Each of these will need to be rallied spending a Tactical Point doing so before the unit can spend their Tactical Points on doing anything else. This is how suppression builds to fire superiority.
 |
| Here we see the effect of not only a Crossfire, but the effective use of the French player of his Push Activation to inflict two Activations worth of shooting onto the German rifle squad. |

Despite the tight spot, the German player has options. He decides to use his off board HMG to try to turn the firefight around to his advantage. True to German tactical doctrine, the firefight was thought to be won by the outside platoon support weapons, with the rifle squads moving as fast as possible to within assaulting distance of the enemy. The German player is going to put that tactic to use...

Off board support weapons are another important element of Disposable Heroes II. Unlike most rules, where support weapons are plunked on the table and used at absurdly short ranges, Disposable Heroes II places them in their more realistic tactical context. Players may use support weapons off board and fire onto the table. For HMGs, this is done through establishing Beaten Zones and a Cone of Fire. This allows these weapons to become more than just a handful more dice when shooting, but to become the true area denial weapons they were meant to be. When a player Activates an off board HMG, he places a blue marker on the enemy unit or spot of ground he wants to establish as his Beaten Zone. Once placed, the HMG may Activate and fire at any enemy unit within 6" of the Beaten Zone marker. This Beaten Zone can also be shifted by using movement Tactical Points which is useful for covering a larger area of ground. This creates true area denial, because any unit that stays within that Beaten Zone may be targeted if they are within 6" (and LOS of the marker itself).
But what about LOS, you ask? Offboard weapons are abstracted when it comes to LOS to their targets. It is assumed that this fire support has been pre-established and is being provided by more than one HMG (German companies had several of these available to support their attacking platoon, often even in support of a single platoon!).
HMGs firing from off board may also establish a Cone of Fire. To do this, the player may place a second blue marker at his table edge and if it has LOS and a clear line of fire to the Beaten Zone, this Cone of Fire may be used to fire at any enemy unit that is within 6" of the line connecting the Beaten Zone to the Cone of Fire. Want to set an HMG up to cover a road? You can do that! This also means any enemy unit that crosses the Cone of Fire line may also be the target of opportunity fire (called Snap Fire). Snap Fire is a single free Tactical Point of shooting during an enemy Activation if an enemy unit moves more than 6" within half the range of a unit.
Here we see the effect of the German player's off board HMG. The German player's sMG-34 HMG opens up and fires at both French LMG teams. Because the French player placed his LMG teams close to each other, the German player is able to set up his Beaten Zone in between them and target both. This fire rains down on the French squad and inflicts several wounds and Suppressions on them.


This fire silences the French guns for a few Activations, giving what the German player hopes is the chance to rally his rifle squads and get them into an assault.

Unfortunately, it is not to be... the French player is able to rally his squad and maintain his fire superiority over the Germans and the turn ends with the German player being forced to send in his Platoon HQ to extricate his squads from being removed from the game by having too many Suppressions. By the time he is able to do so, he is out of Activations for the first turn, and the game ends with the Germans not capturing a French Deployment Point. The game is over with a French Victory!
 |
| Fall back! The Lieutenant withdraws his platoon under fire and back to their original positions. |
Next time, we will dive into some tank action and see how vehicles are used in game, and why you don't need to be a tanker and buy a second set of rules to have fun all-tank action in nearly any scale using Disposable Heroes II! All armor tank battles are built right into the system for our treadhead players.
Thanks!
Fantastic overview of the rules. I find the system quite intriguing. One question, is the Long Road South supplement still compatible with the changes to DH2? I'm most interested in a Nam campaign.
ReplyDeleteThanks! Glad you found it useful. The Long Road South could easily be used with some modifications. You'd have to assign the weapons in LRS with comparable DH II stats (I'd use the Stg-44 as a starting point for assault rifles in Nam). You'd also have to assign T&E values to the Nam platoons. Otherwise, it should work just fine with a little work. The vehicles are pretty much a straight port over to DH II. Hope that helps!
ReplyDeleteKeith,
ReplyDeleteWow, super post, and I’m looking forward to more! Thanks for the detailed peek into the rules, fantastic! I had no idea version 2 was such a dramatic departure from version 1, basically a whole new set of rules. And I’m really digging it, the concepts sound great, particularly the force ratios, reserves, and off table MG/mortars.
I think I’d like to try these for my WWII US Marines in the South Pacific campaigns (getting ready to start Guadalcanal, already did fictional campaigns in the Philippines and Dutch East Indies). I’m sure they’re in the rules, but could you provide some additional info (either here, or in a separate blogpost), on the following?
1. How the game works for clashes between patrols (I guess the standard ‘meeting engagement’ at platoon level, and
2. Can it work for even tighter platoon frontages, such as the Marine defense at Alligator Creek and the counterattacks
back across the Tenaru?
3. With the battle space being much smaller due to the foliage/close in terrain, can you get MGs on the table (such as the Marine M1917s at Alligator Creek)?
Thanks in advance.
V/R,
Jack
Thanks! Glad to hear you are interested. It is very much a new system in a lot of ways. I learned a lot over the past 15 years you could say. I'm very happy with the system, and I hope to really share my passion for this level of play on this blog.
ReplyDeleteThe USMC and Japanese are in the main rulebook, so that should give you what you need for Alligator Creek. To answer your questions:
1. The Meeting Engagement in the book covers patrol size games with more even forces and will give you the type of skirmish you're looking for in that regard.
2. You could shrink the frontage down even more if you wish. Maybe put two defending USMC squads on the table and their supporting M1917s. Then have the Japanese attack with two full platoons each controlled by a separate player. On a 4x6 this would give the correct feel for that close in action of that scenario. I think it'd work well.
3. You can always put the support weapons on table, so that'd work just fine. I think in cases like Alligator Creek, it is absolutely appropriate having them right up on the line. There are rules for fighting at night and flares too, so that'd round out that action very nicely.
Hope that helps!
Keith,
DeleteExcellent, and thanks for the quick response!
1. Sounds good. I’m very interested in how the empty battlefield portion works in the meeting engagement. Both sides start with one squad on table, then feed the others in based on taking objectives?
2. I’m mostly a solo gamer, so I’m not likely to go the bigger fight route (2 squads vs 2 platoons), is rather keep it to one squad and an MG, with another squad in reserve, vs a full platoon with maybe some support. That brings up another issue: are there solo mechanisms in the rules? If not, that’s ok, I’m used to figuring it out on my own, I’m just curious due to the interesting stuff your doing with the empty battlefield and off-table reserve.
As a side note, I’m a fan of the Lardies’ Chain of Command, but I found it very difficult to play solo. My solo-gaming is less of the detached, “play each side to the best of your ability,’ and more of the ‘I want to win against a semi-preprogrammed opponent.’ Chain of Command had too many decision points to make on the part of the enemy that were supposed to be a surprise to me, the opposing player, that I just couldn’t resolve.
3. Sounds awesome. Dammit, I’m way over my wargaming budget already this month, the wife is gonna kill me! ;)
Very cool, and thanks again!
V/R,
Jack
Glad to help.
Delete2. Yep, both sides essentially act as the attacker in the attack/defense scenario. Both players place their Deployment Points and then bring squads on as they Activate. Both will have two squads on the line, and one in reserve and available support weapons. This can be modified though to one squad each, with one in reserve and limits on support weapons etc. if you're looking for a smaller patrol style game.
2. Unfortunately, no specific solo rules. It will play solo, but not with a preprogrammed style opponent. Though if you set up an attack/defense, you could stipulate certain automatic actions the defender would take, but that would take some preplanning not covered in the rules.
3. Ha! I'm continuously over my wargaming budget! I have a pretty patient wife who does appreciate that because of writing rules, it occasionally pays for some of my projects though :)
Hope that helps!
Yeah man, thanks a bunch, and I actually picked up the PDF last night from Brigade Games.
DeleteV/R,
Jack
OK, I ordered both DH2 and LRS. I may still be coming back with more questions. Thanks!
ReplyDeleteNow you got me wanting to paint the rest of my 28mm US Air Cav and PAVN platoons...
DeleteNo problem! It is planned that I will be redoing the Long Road South as well as most of the other supplements for the original DH system down the road. Up next is This Very Ground. After that the British army book and the Soviets. Beyond that is yet to be determined. Let me know if you have any questions. Thanks!
ReplyDeleteDid I read this right that This Very Ground is getting an update? My wife and I have been really hoping that his would happen!!!
DeleteSorry, I must have missed your comment when it was originally posted. I'm working on This Very Ground as I type. I'm planning to hand it off to Brigade in September and hopefully released in time for Fall In.
DeleteGreat post, Professor! I really like the new DH. I can field my US Armored Infantry Platoon the way they actually used with the 1/2 tracks off board providing fire support.
ReplyDeleteThanks Frank! Good to hear you're playing the new rules and that you're enjoying them. Holding halftracks off board to provide LMG (or .50 cal) support fire would work perfectly. I pity the Kraut on the other end of that...
DeleteI’m not usually a process-oriented game player – a results-oriented game can work just as well for me. However, DH2 looks like a challenging and interesting process-oriented game that won’t pull a mental muscle. So many decision points that are simply resolved make for a game with a lot of rapid action and suspense. What’s not to like?
ReplyDeleteOne question about MG fire teams. Belt fed LMGs receive 4 FP per tactical point expended. Added to this are weapons possessed by individual crew members. For example, an additional FP for rifle armed crew and maybe 2 FP for SMG armed crew. I’m having a little difficulty getting my thick head around when a MG crew would be using these other weapons. Wouldn’t they be servicing the MG and assisting the gunner instead of firing their own weapons?
Maybe I’ve missed something or are overthinking this but adding additional FP(s) to the MG FP’s for crew members that are assisting the gunner by supplying reloads, changing overheated barrels, etc. makes more sense to me. I suppose in actual game terms it makes almost no difference to the number of die rolls but seems a little cleaner in terms of function.
Good question: The fire put out by the MG team factors in men assisting the gun. That is why rifle fire is not based on per rifle in the unit, but only as 1 FP per Tactical Point shooting. SO this assumes most of the men in the MG team assisting the gunner, but at least one contributing to the fire as well as an abstraction. Leaders adding their SMG to the fire (3 FP) is only going to happen at really close range where it makes sense (within 15").
DeleteYou could reason that the extra FP is because the gun is firing at a higher efficiency due to the men assisting, and you are right, the math would work out the same. The reason it was done the way I did it though was to create a cleaner mechanic across all of the different weapons instead of coming up with special rules for assistants and having to worry about various circumstances that people tend to expect when you have rules for assistants (what happens when you remove casualties? Do the assistants have to be next to the gun? etc. etc.) which all gets very cumbersome and clunky very quickly. This is what the original DH used to do, and it was actually a process oriented system for MG fire. This is actually more a results oriented mechanic in that it rationalizes a consistent system for fire across all weapons systems and applies them consistently as well. It made for a much cleaner system.
Hope that helps explain the thinking.
Thank you for the quick response!
ReplyDeleteYes, as a design decision it makes perfect sense and the math is nearly identical. Is there a way to follow this blog? I would hate to miss one.
I think blogger has a follow feature with a link somewhere on the page. At least it should show up as one.
DeleteKeith,
ReplyDeleteFor Guts Checks, the rules state "Every time a unit is fired on by an enemy unit, regardless of whether the fire inflicted any hits, the unit rolls 1D10 for each Incapacitating and Suppressing Hit..." So if there were no I/S Hits, do you still roll 1D10? Thanks
Still roll a 1D10 Guts check for taking any kind of fire, even indirect fire that misses.
DeleteExcellent, thanks Keith.
ReplyDeleteGreat write up, thank you! Looking forward to your armored battle.
ReplyDeleteThanks! Armored battle coming next week. I have to grab my 15mm armor from the club and set it up at the house here to get some photos and a write up going.
DeleteAnother question, Keith - If I read it correctly, A US BAR team could activate, spend a shooting tactical point first, and could then still decide to use another shooting point for itself, and share a shooting tactical point with the rifle team. Or did I interpret that wrong? Thanks.
ReplyDeleteYou got it. You can share those tactical points that way. Especially as each is resolved (for example, you might want to resolve one, then decide to share a move tactical point instead of shooting again).
DeleteThanks, Keith!
ReplyDeleteHi Keith,
ReplyDeleteThank you for creating this blog. I have a question about the Forward Deployment Point rule, it states - Forward Deployment Point: The player may attempt to push a Deployment point straight forward by 6". If successful, the player may deploy units from this forward location during the game.
My question is how do you attempt/check for success?
I play all of your WWII rules, DHPB, DHC7B and now I am learning these so your help is appreciated. Also play and love Price of Glory!
Cheers
Bill
You know, that isn't specified, and it should be. There actually isn't a need to determine success or failure in that if it is one of your pre game choices. I think the wording was never changed in the editing process unfortunately.
DeleteSo in the case of choosing to move your deployment point forward, it simply takes up one of your choices.
If you want to have an element of risk added, you could establish a roll for it using the recon chart for pre game recon and if successful, your recon finds a route to allow you to move that point forward a little further.
Hi Keith,
ReplyDeleteA unit can attempt to remove a Suppression Counter only once per Activation up to a maximum of 3 rally attempts (1 per TP). I take this to mean that a unit with 3 SC's could make three Guts Checks; however, if there were only 2 SC's and it failed the first one, it could make an attempt on the other counter and that would end its Activation (with a TP still in hand). Or if it only had one SC, if it failed the first Guts Check, that would end its Activation with 2 TP's still in hand. Thanks
Correct. You can attempt each Suppression, but if you fail once or any, you can't do anything else except Fall Back.
DeleteThanks, Keith.
ReplyDeleteNo problem!
DeleteHi Keith,
ReplyDeleteSorry about the late reply, work got in the way of fun. Thank you for the clarification!
Cheers
Bill
No worries, glad to help.
DeleteHi Keith,
ReplyDeleteFor rallying, the unit must use it's own Guts score, or the score of a friendly unit within Command Distance. If they use a friendly units Guts score, does that unit have to meet the Coherency requirements of the 2 paragraphs below? Thanks
Correct. The unit that they are sharing Guts score with must meet coherency rules.
DeleteThanks Keith, that's what I thought made sense. Cool write up on the tank action.
ReplyDeleteThanks - bought the rules off the back of this write up to try with our group in Cardiff.
ReplyDeleteHi Keith,
ReplyDeleteJust getting started with DH2 recently, and enjoying it so far, but I have a question re; tactical points spent on shooting.
It seems like the idea of only counting the weapon types in a team once rather than the number of weapons of that type has some odd effects in some cases. For example, A German rifle section where there is a leader with an SMG and four grunts with rifles vs a Russian SMG section where all five men have SMGs. The way I'm reading the rules, the rifle section would have 4 dice to shoot with up to 15" and the smg section would only have 3, which seems bass-ackwards. Has this come up before, or am I just missing something in the rules?
Thanks!
It's a good question and it is addressed in the German army book (Angriff) for all SMG or STG armed units and will also be covered in the forthcoming Soviet book. To fix it for your own games of DH II, add a +1 FP to any unit armed with all SMGs or STGs for each Shooting tactical point fired. 1st Shooting Tactical Point: +1 FP, 2nd: +2 FP, 3rd: +3. So an SMG armed unit such as the one you are using will have 4 FP for 1st Shooting Tactical Point, 8 FP for 2nd, and 12 FP for 3rd. Hope that helps!
DeleteWhen DH was published, none of the units in the army lists in the book had all SMGs.
Thanks for the reply, that certainly seems more appropriate for all-smg units; I had just been doubling their firing points. I'm a little unclear though about the number of FP mentioned in your reply. Would an all-smg team that spent all its tactical points shooting roll a total of 12 dice (4+4+4), or 24 dice (4+8+12)? Is the idea there to give them an overwhelming sustained fire bonus? Thanks again!
DeleteHello Keith,
ReplyDeleteI'm looking for the instructions for converting DH1 supplement stats to DH2. I don't have a FB account and I can't find any information as to where to acquire it. I have a large collection of Pacific forces and would use them with DH2.
Thanks!
These are Pacific trrops I intend to use...
ReplyDeleteBritish
Indian
Chindit
Gurkha
US Army
US Marines
PNG/Islanders
IJA
SNLF
Are any of these in the main DH2 rulebook?
Thanks in advance!
Dave
Hello,
DeleteYou'll find the late war British, US Army, IJA, and USMC lists in DH II. The rest are either variations on the lists in the book, or could be easily created using the existing lists as a template. Some of the lists such as the Islanders, I do not have info for (The Islanders, I have never researched). The Gurkha I think could be done easily enough using the Brit list I think. There is a plan to redo the original Red Sun Red Death book for DH I updated for DH II, but that's not in the immediate plans for Brigade Games (Soviets and Brits are up next). Hope that helps, sorry I can't offer much more right now.
Hi Keith,
DeleteI purchased the rules a couple of years ago, but haven't used them for well over a year now. I was wanting to get back in; however, I have apparently lost or not recorded my pdf password and now cannot open the file. I have emailed Brigade a couple of times but not gotten any reply.
Any suggestions? Thanks
The Gurkhas, Indians and Chindits can all be run as British Commonwealth so that would work. Lon said that he thought there was some sort of “conversion” document that outlined the process and that it could be found on the II Facebook site. I don’t do FB, that’s why I was asking here. I do have RSRD so I could reverse engineer (if needed) using the USMC and Japanese. My Higgins boats showed up today and that has me thinking of DH2 and a beach landing. Ps: I forgot to add my West African plt to the list.
ReplyDeleteIs there a FAQ available anywhere?
ReplyDelete